Next, modifiers is part of the menu integration. Modifiers are like selection for you to choose for the products. For example, like McDonald's, when you choose Fries, you can choose Large, Medium or Small fries. The large, medium or small selection are so called Modifiers.
I will be including pictures and step by steps on how to configure modifiers for the backend and how does it looks like on the POS system.

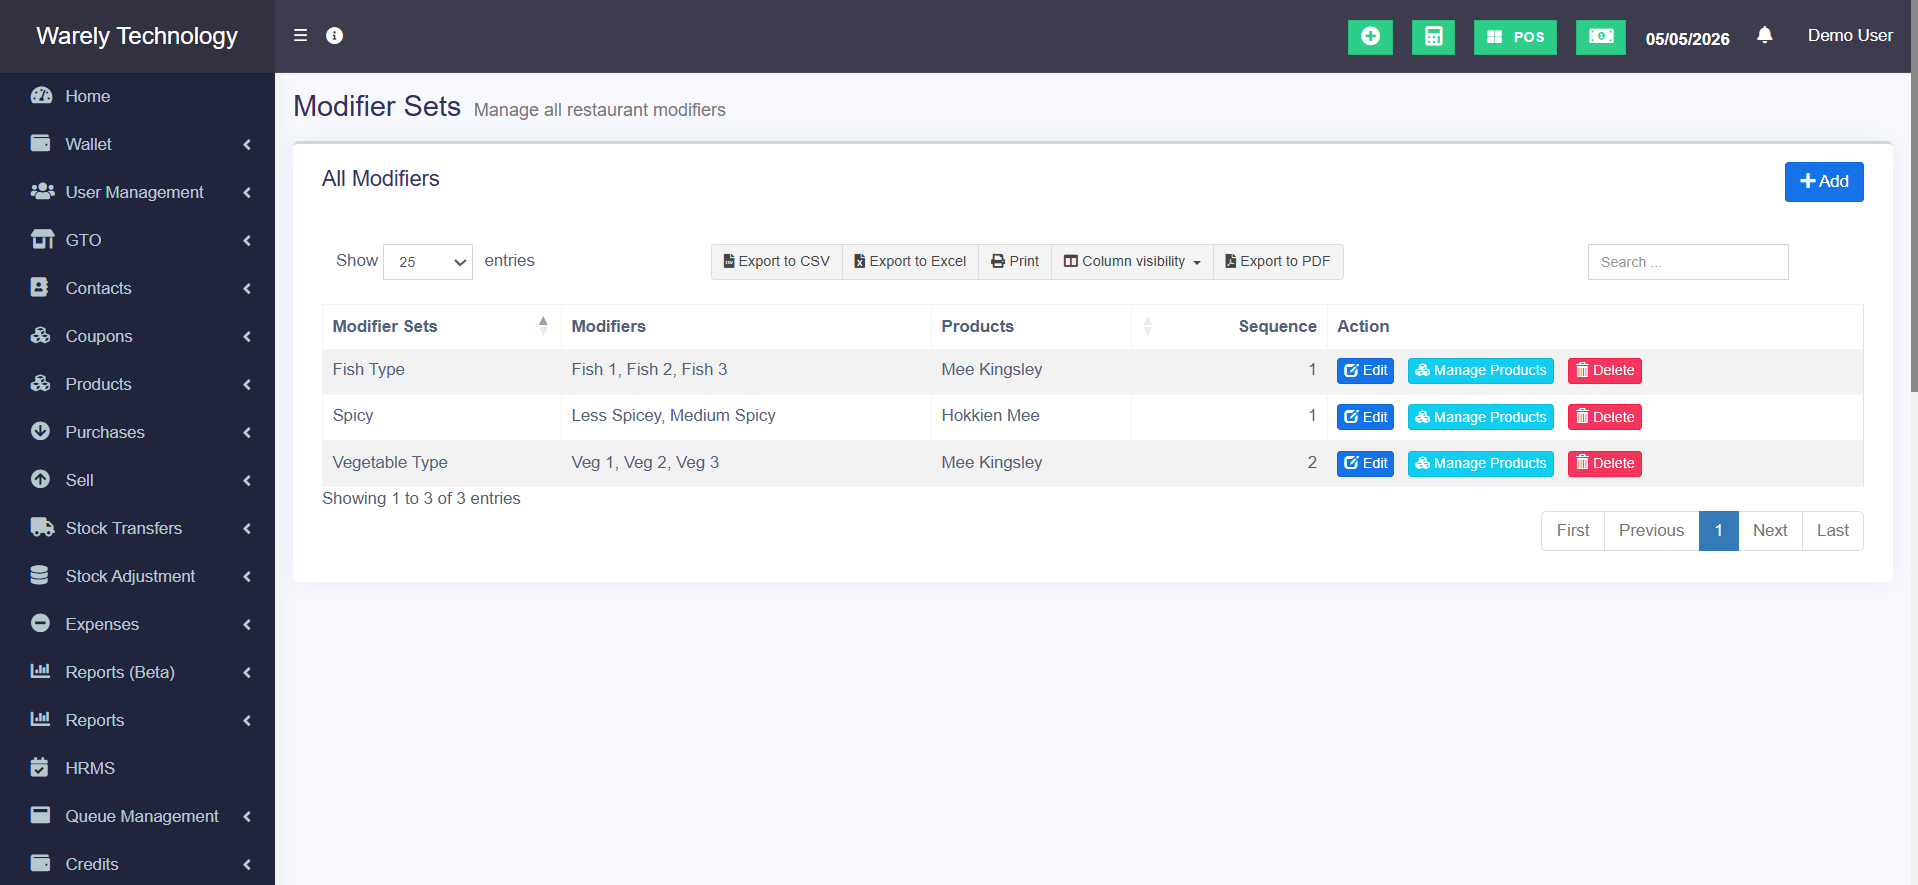
Above as attached is the picture of the "Modifiers" section. As you can see, there are some modifiers has been created. If you would like to create a new modifier, you can click on the "+Add" button above.
After clicking "+Add" you will be redirected to a new page. Which is as shown below.
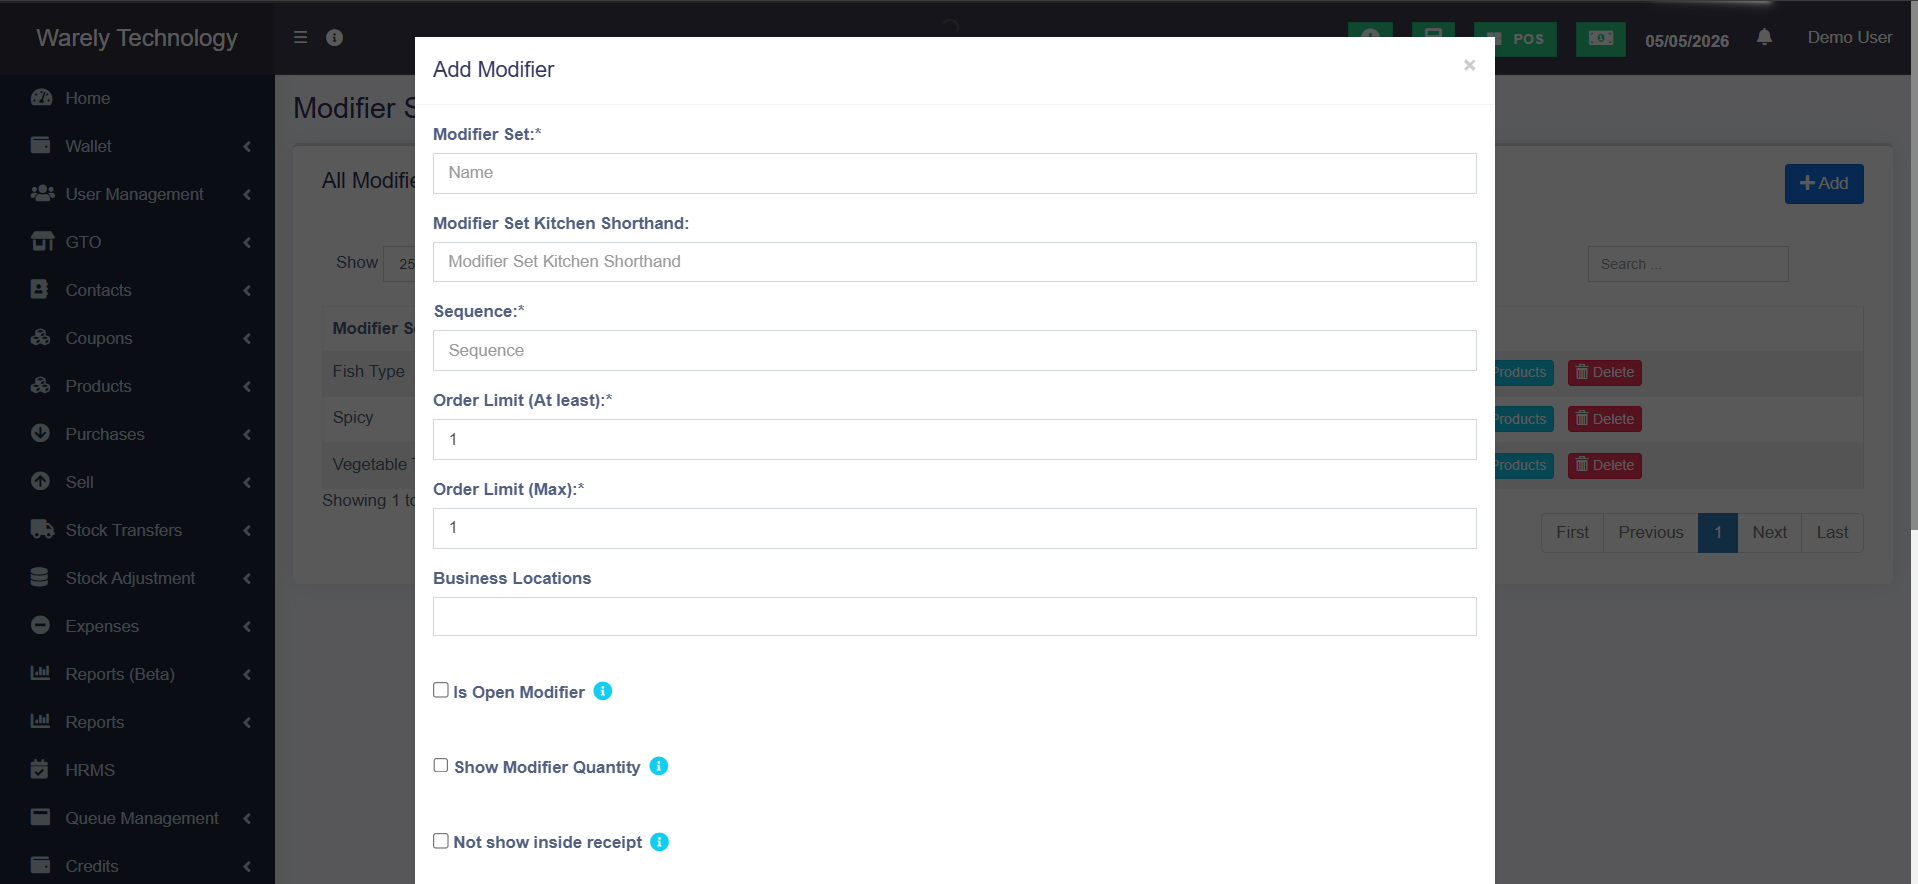
At here, you are able to create your own modifier. You are require to put in the name, sequence, business locations. (E.g. I put the modifier set name as Size).
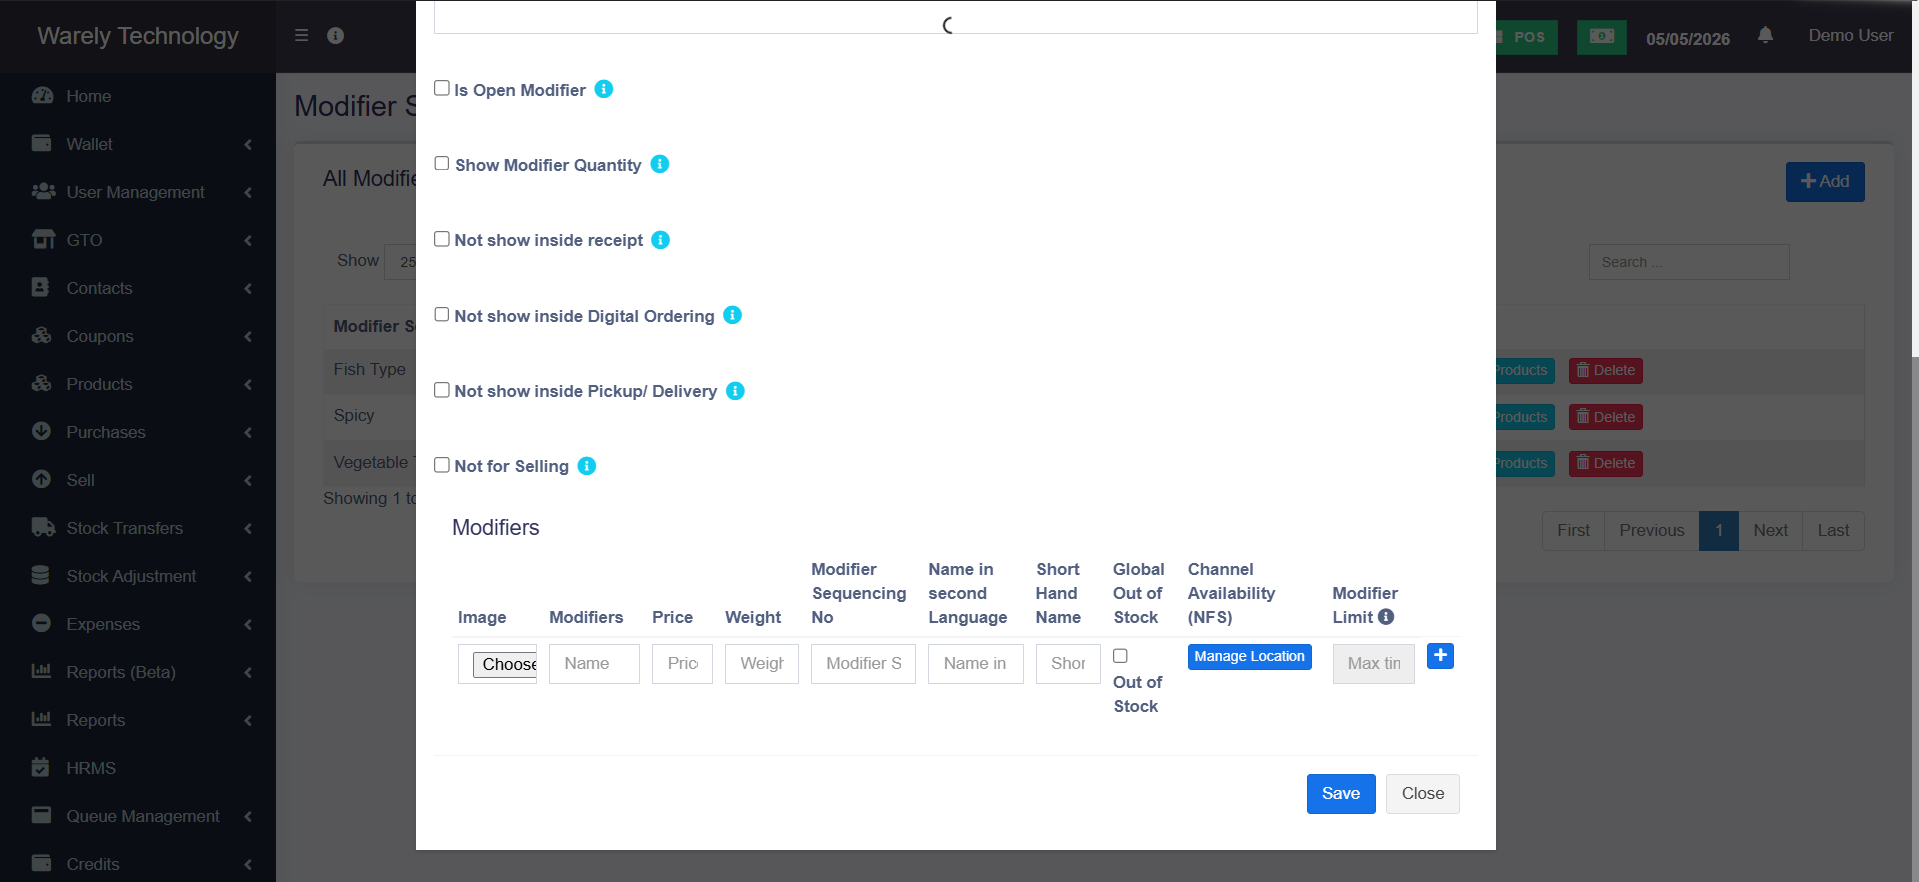
After that, when you scroll down, you are able to see this whereas you can put the modifier name, price, weight and sequencing. (e.g. I put the modifier name as XS, S, M, L, and XL by clicking the blue "+" button on the right side). After that, click on "Save" and your Modifier is done. But before that, you need to assign products into it in-order for that specific product to have selection.
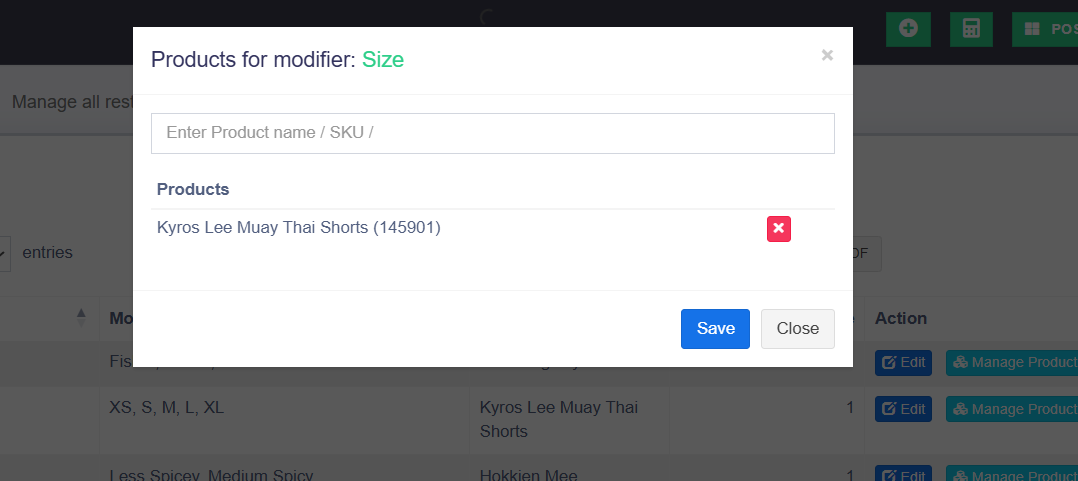
After creating, and by pressing the "Manage Products" button, you will be able to get this popup. In the "Enter Product name / SKU" put in the product that you wanted selection for. (Mine will be "Kyros Lee Muay Thai Shorts). Then, Click Save and your modifier is ready.
This is how the modifier looks in the POS.

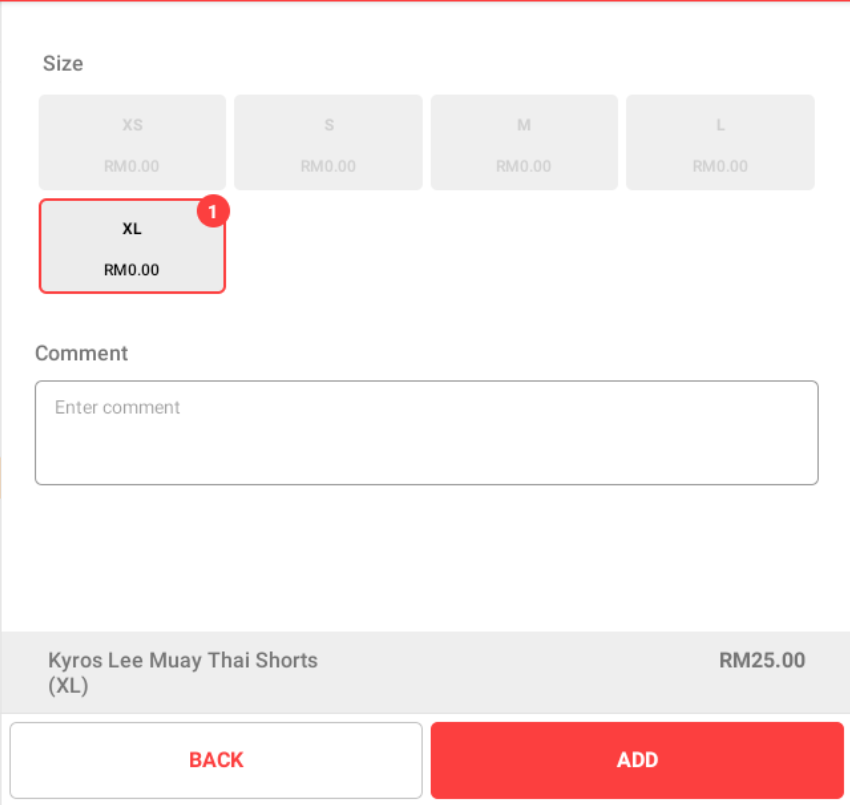
After clicking into the product, you will be able to access into the "Size" modifier. As where you can see there will be XS, S, M, L and XL that we have created just now. After choosing one of the size, click on the "Add" button on the bottom right corner.
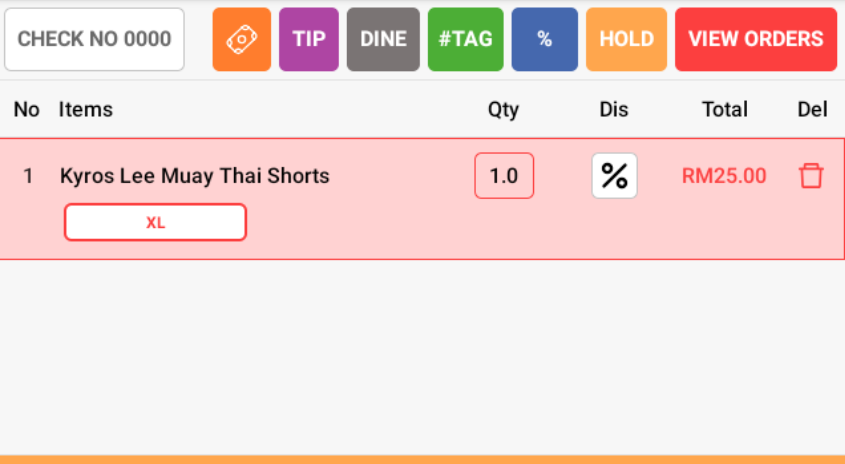
After Adding the modifier, you will be able to see the size on the product where it writes "XL" on it. Next, proceed to check out and done!